Over-the-Range Microwave Installation: What You Need to Know
Installing an over-the-range microwave involves more than just lifting it into place, here is what to plan for before you start.
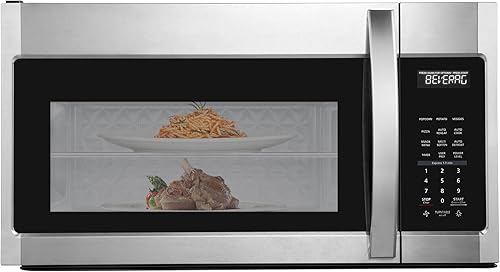
An over-the-range microwave is one of the most practical upgrades you can make to a kitchen. It combines a microwave and a ventilation fan in one unit, saving counter space and clearing the view above your cooktop. That said, the installation is a two-person job that requires a bit of prep work, the right tools, and a clear understanding of what goes where. This guide walks you through the basics so you know what to expect before you begin.


What You Will Need Before You Start
Gather your tools before anything comes out of the box. You will need a power drill, a stud finder, a level, a tape measure, and a set of screwdrivers. Most units ship with a mounting template and a top cabinet mounting plate, but it helps to have a pencil and masking tape on hand to mark the wall clearly. Plan to have a second person help you lift the unit onto the wall bracket, since most OTR microwaves weigh between 35 and 75 pounds. Confirm that a dedicated 120-volt outlet is already inside the upper cabinet directly above the installation spot, or arrange for one to be added before install day.
Understanding Clearance Requirements
The standard minimum clearance between the bottom of an over-the-range microwave and the cooking surface below is 13 inches over electric cooktops and 30 inches over gas cooktops, though many manufacturers recommend 66 inches from the floor to the bottom of the unit. Always check your specific model's installation guide, as requirements vary. Insufficient clearance is a safety hazard and can also void your warranty. Most OTR microwaves fit in a 30-inch wide cabinet opening, though 24-inch models are available for smaller kitchens.
The Mounting Template Is Your Best Friend
Every OTR microwave includes a paper mounting template. Tape it to the wall where the unit will hang and use it to mark the exact locations of the wall studs, the power cord opening, and the vent hole. Getting these marks right before you drill saves a lot of frustration. A stud finder will help you confirm that you are hitting solid wood rather than drywall. The mounting plate bolts into the studs, and the back of the microwave hooks onto this plate before bolts come down through the upper cabinet to secure the top.
Venting Options: Recirculating vs. External
Before you install, decide how you want the microwave to handle cooking vapors. Externally vented units push air through a duct that exits through the wall or ceiling, which is the more effective option for grease and odors. Recirculating (ductless) models filter the air through charcoal filters and push it back into the kitchen, which requires no ductwork but needs those filters replaced periodically. Many OTR microwaves can be configured either way depending on a damper or fan setting inside the unit. Check whether your home already has a duct run in that location before committing to one approach.
Lifting and Hanging the Unit
With the wall plate secured and the cabinet holes drilled, it is time to hang the microwave. One person should hold the bottom of the unit while the other guides the back lip onto the wall mounting plate. The unit tilts up and settles into the plate, then gets bolted down through the floor of the upper cabinet. Do not skip the bolts through the cabinet top, they carry a significant portion of the weight and keep the unit from tilting forward. Once the unit is hung, plug it in, run the power cord into the cabinet through the knockout hole, and test all functions before finishing.
Common Mistakes to Avoid
Skipping the stud finder is the most common mistake, mounting into drywall alone will not hold the weight long term. Installing without a helper is another frequent problem, and attempting to hold a 50-pound microwave overhead alone is genuinely dangerous. Double-check that the vent damper is positioned correctly for your chosen venting direction, since many owners discover post-install that it was left in the wrong position. Finally, do not overtighten the bolts through the cabinet floor, as this can crack the cabinet floor or strip the threads in the mounting bracket.
When to Call a Professional
If your kitchen does not already have an electrical outlet inside the upper cabinet, you will need a licensed electrician to add a dedicated circuit before installation. Similarly, if you want external ducting but none exists, cutting through walls or a ceiling is typically a job for a contractor or experienced DIYer. Some manufacturers also specify professional installation as a warranty requirement, so read the fine print. A professional installation typically costs between $100 and $200 on top of the appliance price, and it gives you peace of mind that the unit is properly secured and vented.
Frequently asked questions
Do I need a dedicated circuit for an over-the-range microwave?
Most manufacturers recommend a dedicated 120-volt, 20-amp circuit for an OTR microwave. Sharing the circuit with other high-draw appliances can trip breakers. Check your model's electrical requirements in the installation guide and consult an electrician if you are not sure what is already in place.
Can I install an OTR microwave by myself?
It is strongly advisable to have a second person help. OTR microwaves typically weigh between 35 and 75 pounds, and holding the unit at overhead height while guiding it onto the wall bracket is difficult and unsafe alone. The two-person approach also makes it much easier to confirm the unit is level before securing it.
What is the standard width for an over-the-range microwave?
The most common width is 30 inches, which is designed to fit over a standard 30-inch range. Some compact models are 24 inches wide for smaller spaces. Always measure your cabinet opening and cooktop width before purchasing to make sure the unit will fit without modification.
How long does it take to install an OTR microwave?
For someone comfortable with basic tools, installation typically takes one to three hours. First-time installers who need to carefully read the manual and locate studs carefully may take longer. Having everything prepared ahead of time, template taped, tools out, outlet confirmed, makes the job go faster.
Can an OTR microwave replace my range hood entirely?
An OTR microwave does provide ventilation through its built-in fan, but the airflow is generally lower than a dedicated range hood. For light everyday cooking it works well, but serious cooks or those with high-BTU gas ranges often find the ventilation underwhelming. We cover this topic in more detail in our guide on whether you need a range hood with an OTR microwave.